How to Clean Golf Clubs
by Bill Winters
After spending a long day at your local course hitting balls on the range, followed by playing a round, most golf clubs will have gathered quite a bit of dirt on them. If you’re like me, there will be those rounds when you will most likely have taken out a few divots on the fairway and probably had to save a hole by chipping out of the rough. Regardless of how well your round was, your clubs will need to be cleaned to keep them in their best possible condition.
Cleaning golf clubs isn’t all that difficult of a task, but I suggest that you do so regularly. Cleaning your clubs will help keep them from becoming worn and will improve their lifespan. In addition, cleaning will improve your game since a clean club head won’t have any dirt buildup that can get in the way of striking the ball cleanly.
There are numerous golf club cleaning kits available on the market that will work just fine. For an on-the-range option I'd recommend the CLORIS Golf Club Cleaning Kit.
Contents

However, I’ve found you don’t necessarily need all that. Most of the items needed to clean all of your clubs are common household items, and they will not cost very much to replace.
Here are my tips for how to clean golf clubs for the best longevity. I’ll run through some of the basics of cleaning different types of clubheads and grips, and I’ll give you some tried-and-true methods for keeping your set clean for years of long-term use.
Guide to Cleaning Golf Clubs
There are a few different parts to a club, so there are also a few different ways to clean the club as a whole. But in general, you can use the same cleaning tools.
To start, you will need:
- A plastic bucket (big enough to hold several club heads at a time)
- A mild dishwashing detergent
- An old brush with plastic bristles
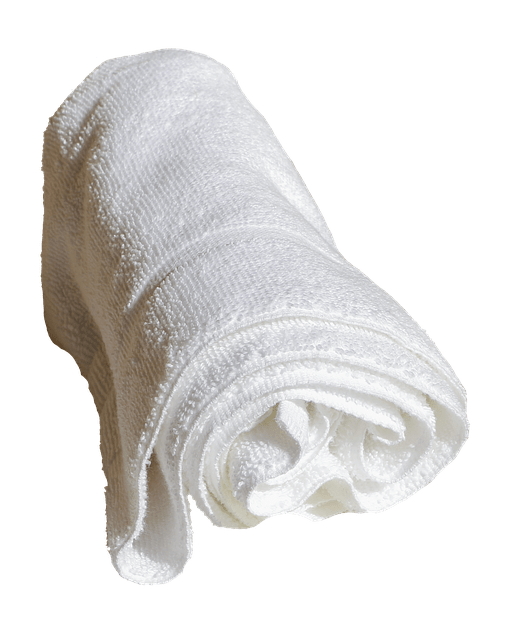
- Old towels for drying off the clubs
Now to get started. I’ve found the best way to clean golf clubs and the various components is as follows:
How to Clean Golf Irons
Cleaning your irons is important because they are the clubs that tend to get the dirtiest from playing a round of golf. Keeping them clean though isn’t too difficult if you follow these steps.
- Mix some mild dish soap with warm water in a bucket or sink. Fill up the bucket with enough water that the heads on your golf clubs are just covered. Then add a few squirts of some liquid dish soap and stir it into the water. It is important to make sure that the water is only warm and not hot or else you can possibly cause damage to the ferrule on the club.

Remember irons are a type of clubhead. If your club has a metal wood head or simply a wood head, you will need to use another method (described in the next section).
- Cover the club heads under the water for a few minutes. If your clubs only have a little bit of mud or dirt on them, then about five minutes in the soapy water should be enough to do the job. However, if the clubs are really dirty or have some deep stains, then it may be necessary to soak the head for 10 minutes or more.
The ferrules are the small ring-shaped pieces that secure the clubhead to the shaft. They should just be above the water. If they are touching the water or below the water line, then you will need to empty out some of the water.
- Use a soft bristled brush to scrub the grooves on the club head. Any type of brush with soft plastic bristles will work well. Many golfers prefer to use old toothbrushes or vegetable brushes to clean the grooves.
Start by cleaning the face first, before moving to the back. Then follow up by cleaning the top
and bottom.
A wire bristle brush should never be used, no matter how dirty the surface may be. This is because it can damage the face of the club, which can negatively affect its performance. If the club head does have any rust on it, then you should be able to remove it with a fine grade steel wool. #000 or #0000 are the best options.
- Use clean water to rinse the club head off. If the club heads still have some dirt on them, then you may need to give them a second scrubbing. It is important to remember to do your best to avoid getting the ferrules wet. A little moisture won’t be an issue if it is dried off quickly.
- Use a soft dry towel to dry the club head. Be sure that the whole club head is clean and dry upon final inspection. If there is any moisture left on the club, it could lead to rust forming. To make the irons look extra special, you can polish them with a chrome or steel polish such as the Club Doctor Iron Polishing Solution. Simply follow the instructions the polish came with.

Cleaning Woods and Metal Woods
Some clubheads are made of wood or metal wood. These require a little bit of a different, specialized technique to keep them in good condition.
- Determine if you have a metal wood or a wooden head. It is fairly rare for a modern club to be made from wood, but older clubs may very well be wooden. Woods with metal heads have a metal plate on the face, and they need to be cleaned differently than true wooden clubs.
- Use warm soapy water and a damp cloth to wash your metal wood heads. Fill up a container with a mixture of warm water and a few squirts of dish soap. Then, dip the dead into the water and lift it out immediately. Use the damp cloth to wipe the head clean. Next, pat the club dry with a clean cloth.
Do not soak metal wood heads as they have holes. Iron heads, on the other hand, are solid.
- Remove any excess dirt in the grooves of a metal wood head with a toothbrush. Soapy water and a cloth aren’t always good enough to remove all the dirt. If this is the case, use a soft bristled brush, like a toothbrush or vegetable brush to scrub any dirt that it still in the grooves.
Take care to not use the brush anywhere else on the head. Never use a brush on a wood
(non-metal) head.
- Use a damp cloth to wipe off wooden heads. Wooden heads should never be soaked in water or any other liquid. Instead, the best method is to wipe them with a soft, damp cloth. Immediately after, dry the heads off with a dry clean cloth.
Polishing wooden heads with a good wood wax like this Interstate WoodWorks Beeswax polishis a great way to make the heads look new.
Simply apply the chosen polish the way the instructions on the package state.
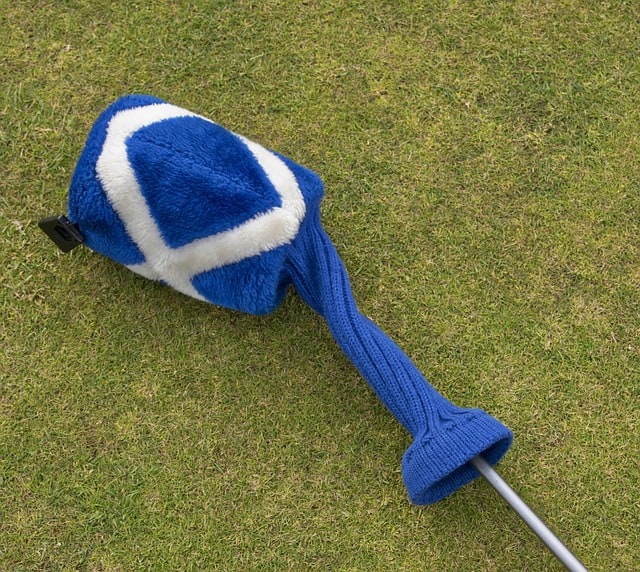
- When the clubs aren’t being used, keep them covered. Wooden heads can easily get damaged, so they need to be protected. Head covers not only will protect the head from getting dented and chipped, but they also will help keep the paint from being damaged. Pick up a low-cost set here.
Although irons don’t require head covers, using them won’t hurt the clubs. Before placing a head cover on any club, make sure to always wipe the head until it is cleaned of any dirt. Failure to do so will potentially lead to moisture being trapped, which can ruin the head. You'll find a great set of iron head covers here.

How to Maintain the Shaft and How to Polish Golf Clubs
Maintaining the shaft and polishing the clubs will help maintain their longevity. Here are the steps on how to do so:
- Steel shafts should be cleaned with a cloth. The easiest shafts to care for and clean are steel ones. Graphite shafts require a bit more effort to care for because they are coated in polyurethane, which is a bit delicate.
- Wipe down graphite shafts with a soft cloth and water. Never use a brush or any kind of solvent. These can damage the polyurethane coating, which can lead to the shafts eventually snapping. Simply wiping the shaft down with a damp cloth will do the trick. Follow this up with wiping the shaft down again with a dry cloth to remove any excess moisture.
- Use wax to polish graphite shafts. Using a wax specially designed for graphite shafts or a high-quality furniture wax is the best way to polish graphite shafts. Because every product is different, you should carefully read any instructions on the label before using any wax.
- If a shaft has any nicks or dents in it, then replace it. This is extremely important for graphite shafts since the outer coating is what helps to hold the shaft together. If damage occurs to the shaft, then you ought to replace it as soon as possible. A damaged shaft that isn’t replaced could snap while being used. This can lead to an injury.
You can also use long neck head covers to protect shafts from damage as well. These can help protect the shaft from being damaged when the golf bag is being stored or transported.
Maintaining the Grips on a Golf Club
The grips get frequent handling, so they naturally will get grime and other build-up. This build-up can lead to wearing down, cracking, or greasiness. As such, it’s important to clean the grips along with the other components of the club every time you clean.
- Use hand soap, water, and a bristle brush to clean the grips. First, use water to rinse the grips before applying a small amount of hand soap. Then use the bristle brush to gently clean the grips. Then rinse the grips clean again.
Make sure that you immediately dry the grips off with a dry towel. Remember that even if the
grips need to be soaked, steel shafted clubs should never be left in water. Leaving them in
water can potentially cause rust to build up in all the hard to reach spaces on the club.
- Repeat this step a minimum of once a month. Bear in mind that grips may need to be cleaned more frequently depending on how much you sweat, how often the clubs are used, and how hot it is.
The best sign for when it is time to clean the grips is when they begin to feel greasy or look
shiny or if they leave any black marks on your hands after gripping the club. Recognizing these
signs helps to create a routine for cleaning your grips. You might also try to clean them on the
same day every month. This makes it easier to remember when they need to be cleaned.
- When the grips begin to start wearing out, sand them down. Use medium grit or coarse sandpaper to gently buff the grips. Buff them lengthwise, working from the top to the bottom. Follow this up with rinsing any residue away with water before drying them off with a soft towel. This will not only help restore the texture of the grip, but it will remove any surface dirt that is left on the grip.
- If there are too many shiny, worn or cracked areas, then replace the grips. While sanding down the grips ought to take care of any cracked or shiny spots, sometimes they are simply too worn from age or use. If sanding is not fixing these problem areas, then it is time to get new grips.
Additional Ways to Keep Your Clubs Clean Between Cleanings
Here are some general ideas to help take care of your clubs between rounds.
- Store your clubs properly. Your clubs should be stored inside your home between rounds. Never keep your clubs in the trunk of your car for an extended period of time, especially if you live in a hot climate. The heat will weaken any glue used on the club.
- Keep a towel on your bag so that your clubs are never put away wet. This allows you to wipe down a club after you use it. As long as the towel is dry, it will do the job. Just never let your clubs be wet when you put them up as that can cause rust to begin to form. A quick wipe down is all that is needed to ensure that your clubs stay in their best shape for as long as possible. My favorite clip on towel can be found here.
- Clean the clubs between rounds. While it doesn’t have to be done after every round, cleaning your clubs should be done at least every few rounds. Focus on removing the dirt and debris from the grooves on the heads. Just performing a cursory cleaning after a round will help your clubs last longer.
- Don’t forget the grips either. Don’t forget to clean the grips every few rounds as well. Also, regularly check for any wear. If you find any wear, make sure to address the problem so that it doesn’t get worse. If the grips are worn beyond repair, you can either regrip them yourself or have your club’s pro shop do it for you. If your grips are no good, then your shots will not go where you aim.
- Check your shafts periodically. Although they are the least likely part of a club to become damaged, they will suffer some wear and tear from being stored in your golf bag. Even with a club head cover on, they can bang against each other, which can lead to dents and chips that could cause a club to snap while you play. If a shaft is damaged, replace it as soon as you can to make sure an accident doesn’t happen while you are playing a round.
In my experience, making sure that your golf clubs are clean isn’t a very difficult task, but it is an important one. By making sure that your clubs are clean, you will help keep them in their best possible shape. I’ve found that cleaning them not only makes the clubs last longer, but it has helped me to play at my best possible level.
Looking for a new set of clubs? Read our golf club reviews article!
 |
 |
 |
 |

About Bill Winters
Those who have not yet tried the sport just can’t imagine what is driving these golfers to brave the sun’s heat and go around a course bigger than several football fields combined. It seems like an awful lot of work considering that the ball is quite small that is must be hard to hit, the ground of the course is not flat and, most annoying of all, there are sand traps lying around seemingly bent on preventing a player from finishing the course.
Thoughts on "How to Clean Golf Clubs"
 |
 |
 |
 |
About the Author

The game of golf may seem like an awful lot to take on when one considers that the ball is quite small, must be hard to hit and carry through windy conditions with little chance for error. The ground course has hillsides which make it challenging enough without adding sand traps who seem bent on preventing players from completing their round!
Get the FREE Gifts now. Or receive the latest golf eBooks for free from our bestselling.
Disable Ad Block to reveal all the secrets. Once done, hit a below button:
 |
 |
 |
 |


